前提
创建一个 XCode 插件,首先先要安装 LLVM 。可以参考上一篇文章 《尝试LLVM》。
正文
首先修改源代码目录 /tools/clang/tools 下的 CMakeLists.txt 文件。
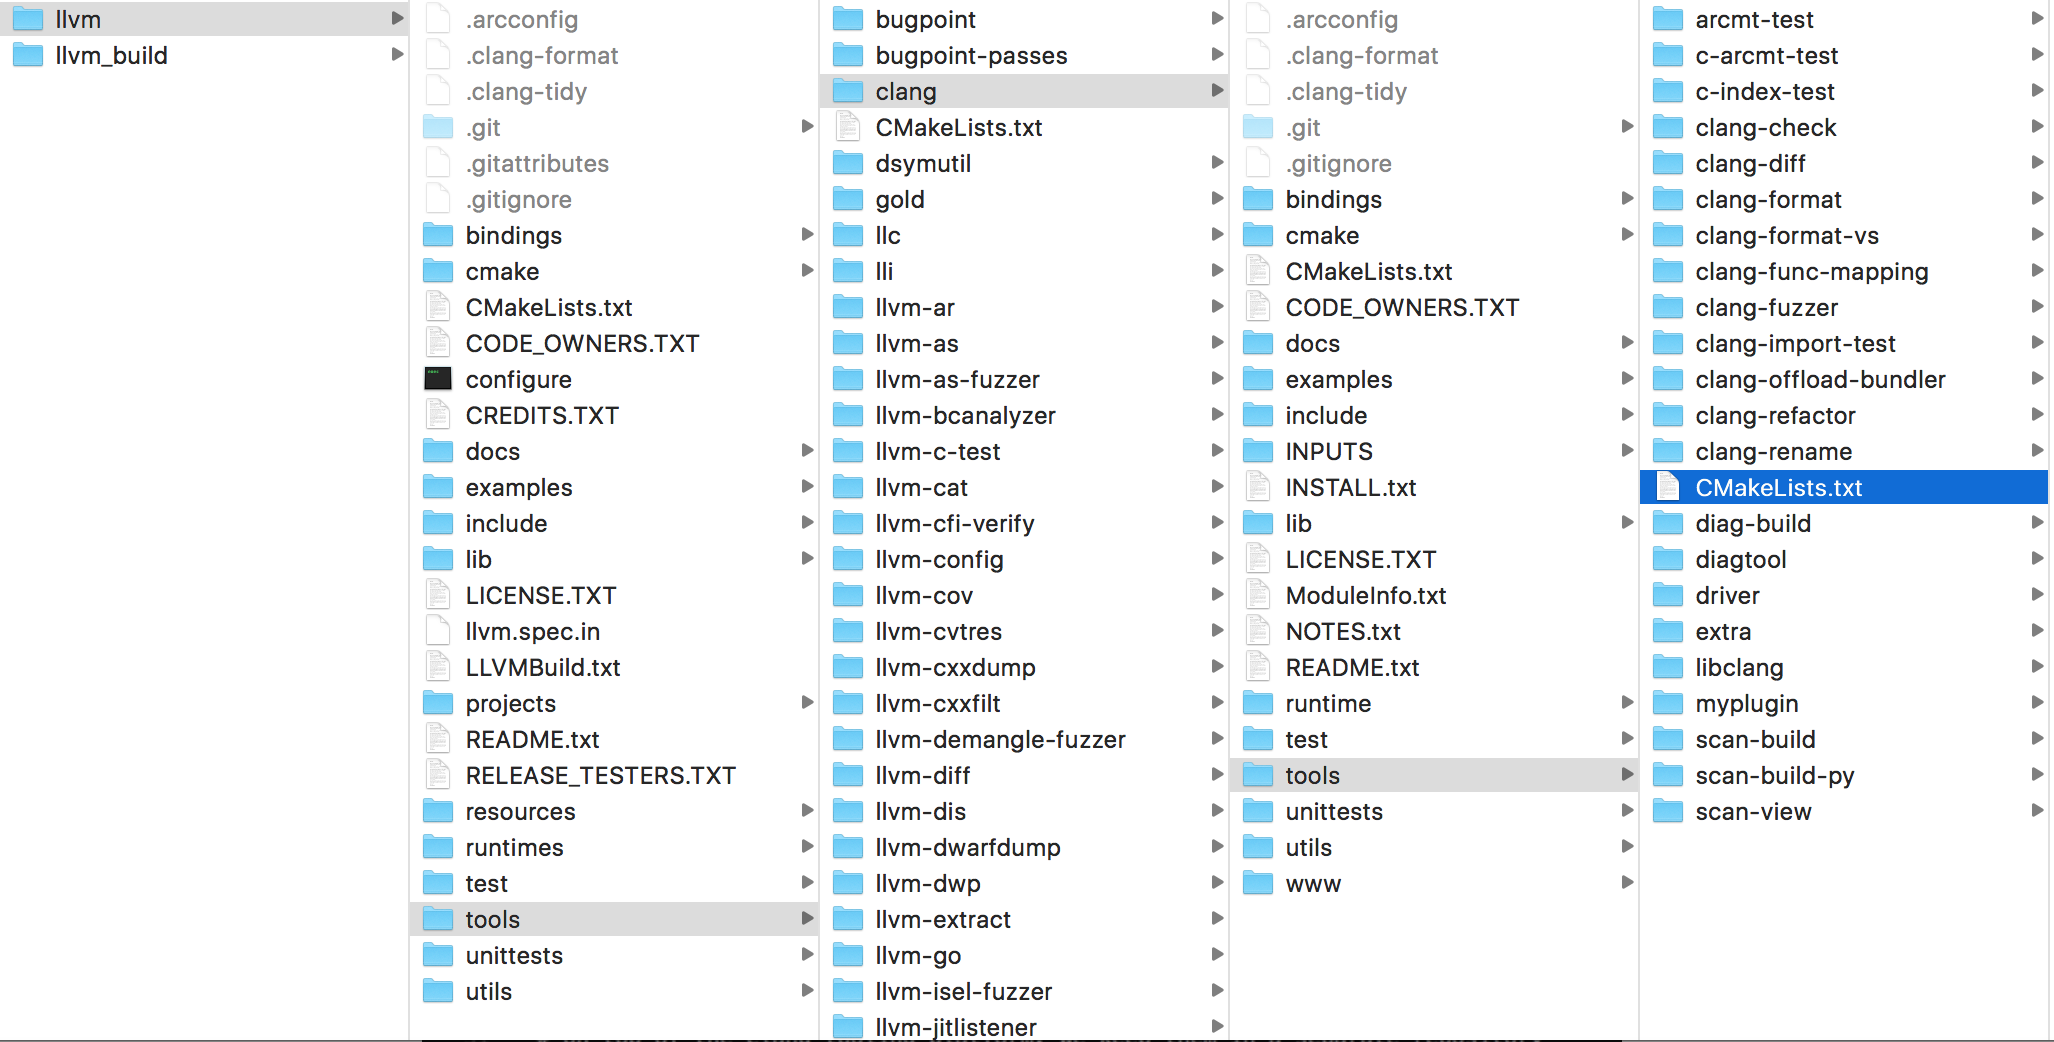
在 CMakeLists.txt 的最后面添加上一行。
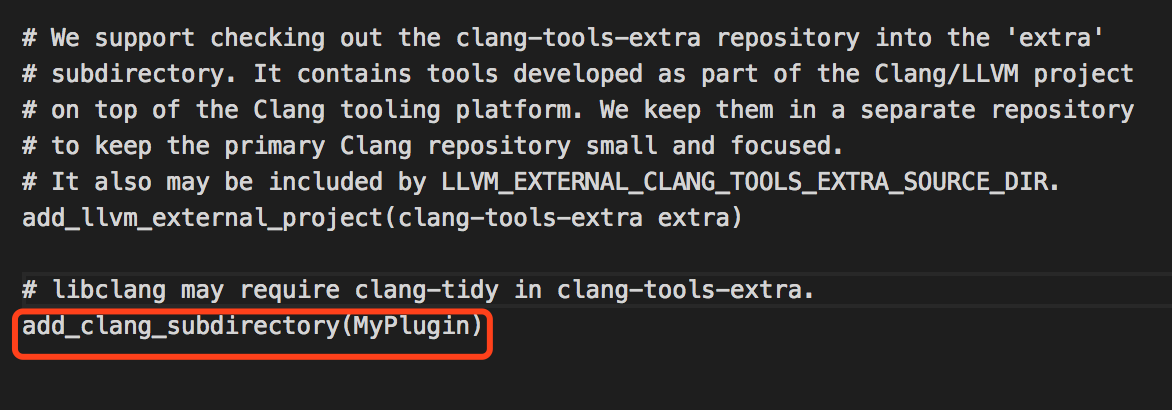
在 tools 目录下添加 MyPlugin 文件夹,文件夹里面新增两个文件 CMakeLists.txt 和 MyPlugin.cpp
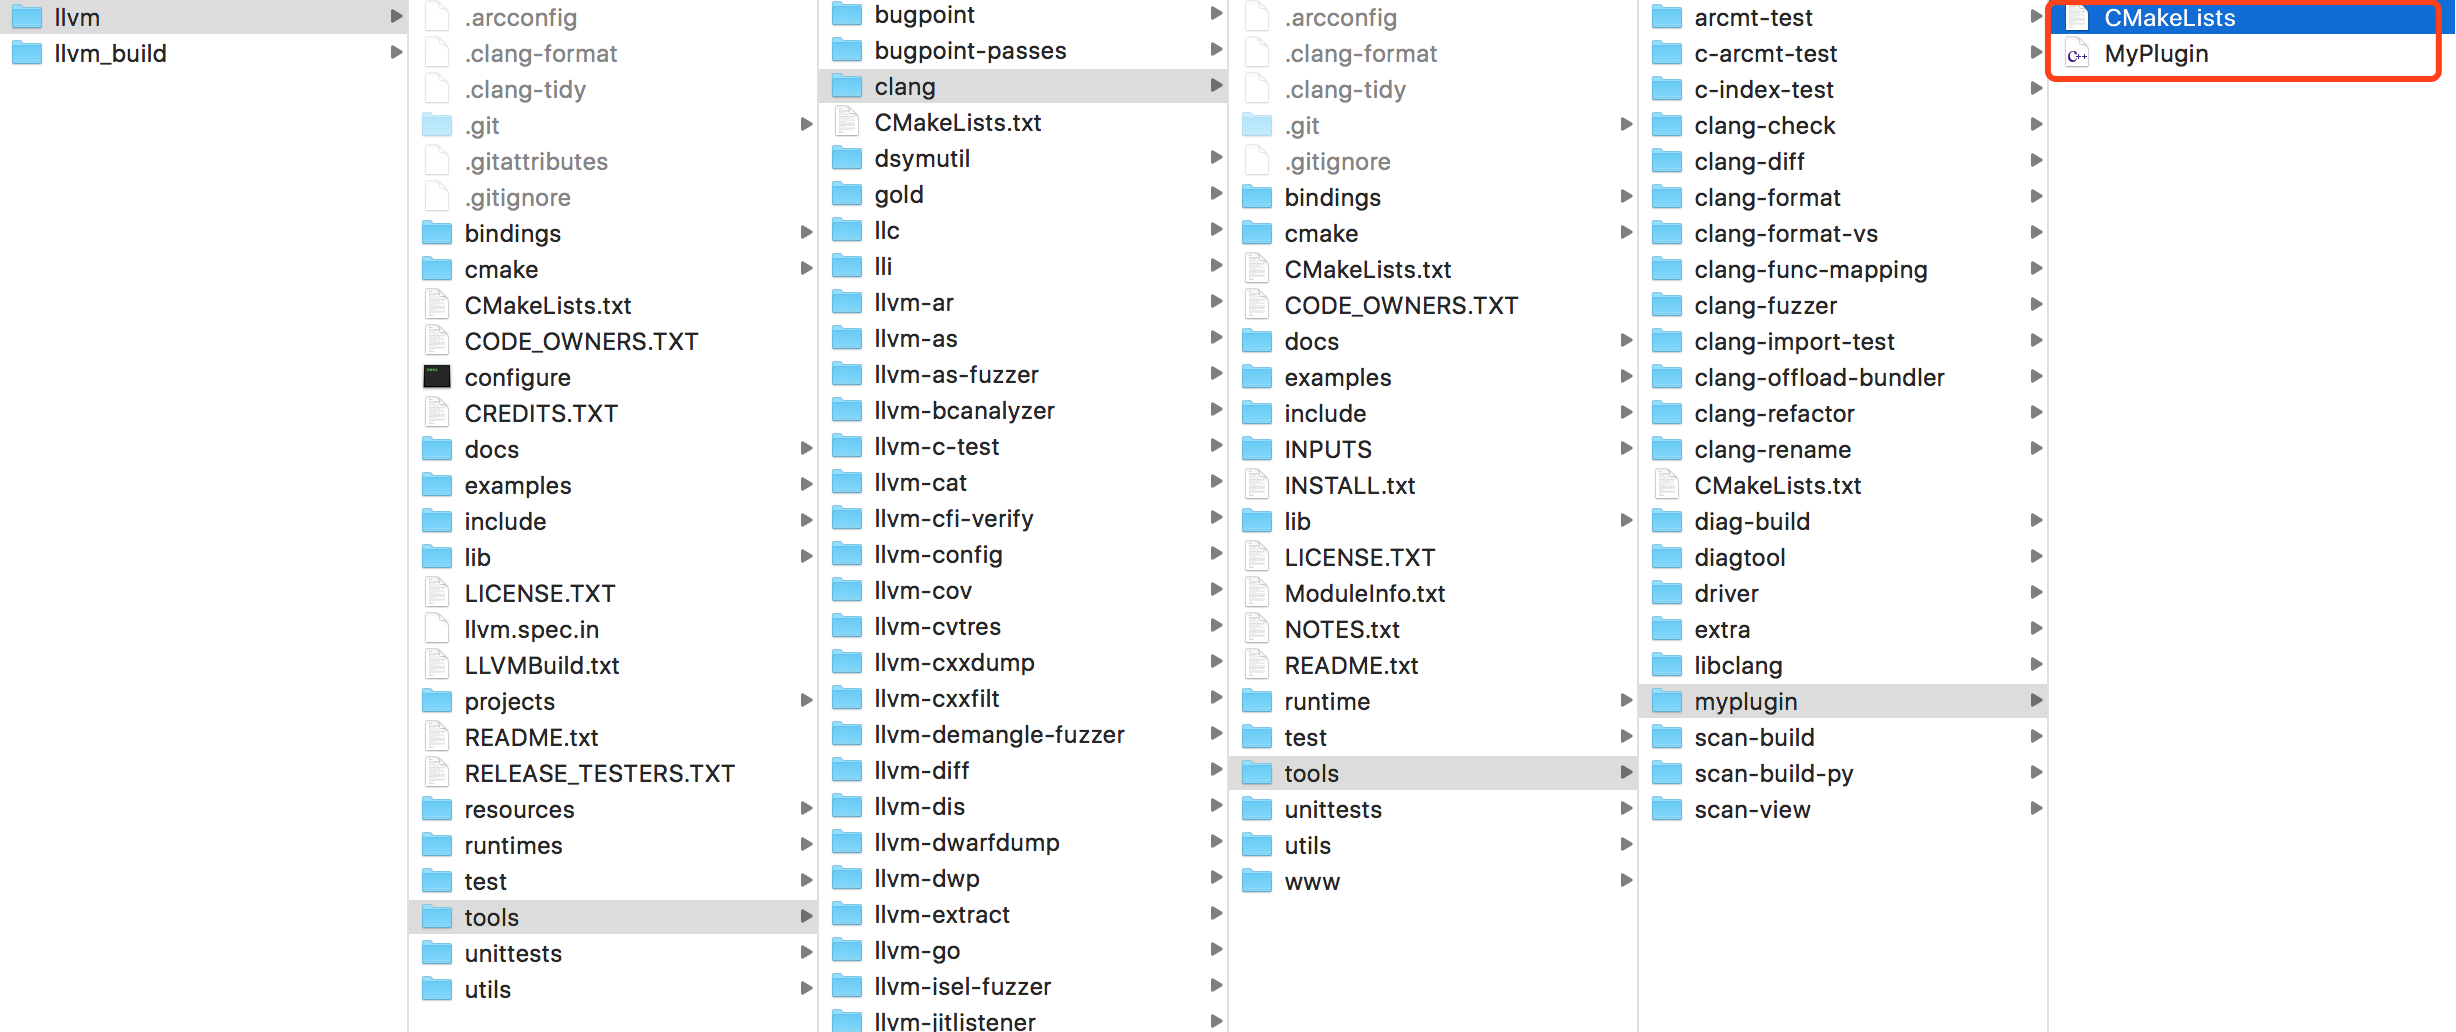
CMakeLists.txt 文件内容如下:
1
2
3
4
5
6
7
8
9
10
11
12
13
14
| add_llvm_loadable_module(MyPlugin
MyPlugin.cpp
PLUGIN_TOOL clang
)
if(LLVM_ENABLE_PLUGINS AND (WIN32 OR CYGWIN))
target_link_libraries(MyPlugin PRIVATE
clangAST
clangBasic
clangFrontend
clangLex
LLVMSupport
)
endif()
|
MyPlugin.cpp 文件内容如下:
1
2
3
4
5
6
7
8
9
10
11
12
13
14
15
16
17
18
19
20
21
22
23
24
25
26
27
28
29
30
31
32
33
34
35
36
37
38
39
40
41
42
43
44
45
46
47
48
49
50
51
52
53
54
55
56
57
58
59
60
61
62
63
| #include <iostream>
#include "clang/AST/AST.h"
#include "clang/AST/ASTConsumer.h"
#include "clang/AST/RecursiveASTVisitor.h"
#include "clang/Frontend/CompilerInstance.h"
#include "clang/Frontend/FrontendPluginRegistry.h"
using namespace clang;
using namespace std;
using namespace llvm;
namespace MyPlugin
{
class MyASTVisitor: public
RecursiveASTVisitor < MyASTVisitor >
{
private:
ASTContext *context;
public:
void setContext(ASTContext &context)
{
this->context = &context;
}
bool VisitDecl(Decl *decl)
{
if (isa < ObjCInterfaceDecl > (decl)) {
ObjCInterfaceDecl *interDecl = (ObjCInterfaceDecl *)decl;
if (interDecl->getSuperClass()) {
string interName = interDecl->getNameAsString();
string superClassName = interDecl->getSuperClass()->getNameAsString();
cout << "-------- ClassName:" << interName << " superClassName:" << superClassName << endl;
}
}
return true;
}
};
class MyASTConsumer: public ASTConsumer
{
private:
MyASTVisitor visitor;
void HandleTranslationUnit(ASTContext &context)
{
visitor.setContext(context);
visitor.TraverseDecl(context.getTranslationUnitDecl());
}
};
class MyASTAction: public PluginASTAction
{
public:
unique_ptr < ASTConsumer > CreateASTConsumer(CompilerInstance & Compiler, StringRef InFile) {
return unique_ptr < MyASTConsumer > (new MyASTConsumer);
}
bool ParseArgs(const CompilerInstance &CI, const std::vector < std::string >& args)
{
return true;
}
};
}
static clang::FrontendPluginRegistry::Add
< MyPlugin::MyASTAction > X("MyPlugin",
"MyPlugin desc");
|
再次在 llvm_build 目录下 CMake 构建一下。
1
| cmake -G Xcode ../llvm -DCMAKE_BUILD_TYPE:STRING=MinSizeRel
|
重新打开 LLVM.xcodeproj 工程,会发现多了一个 MyPlugin 的编译目标,选中进行编译。
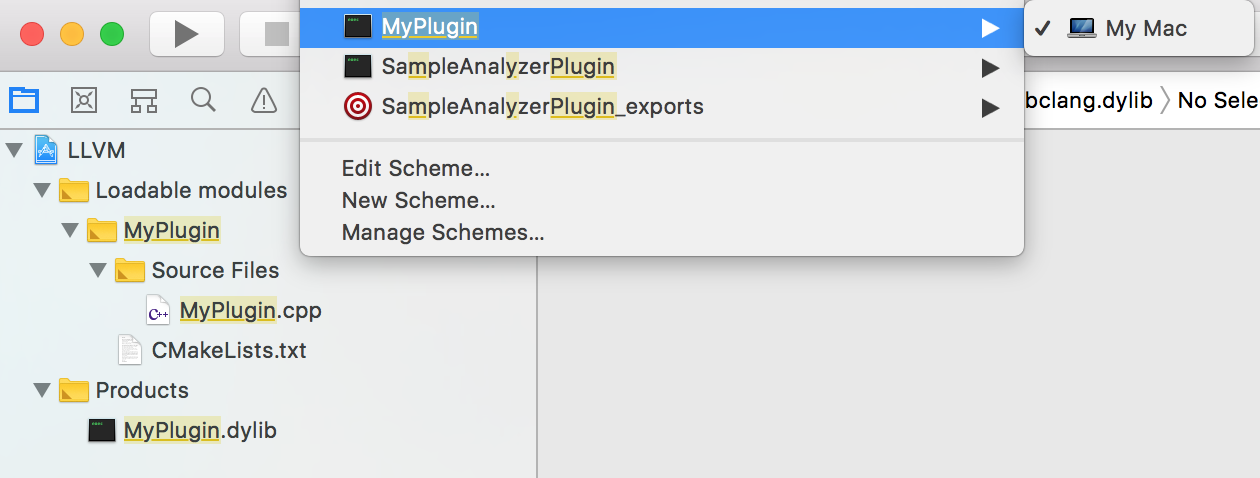
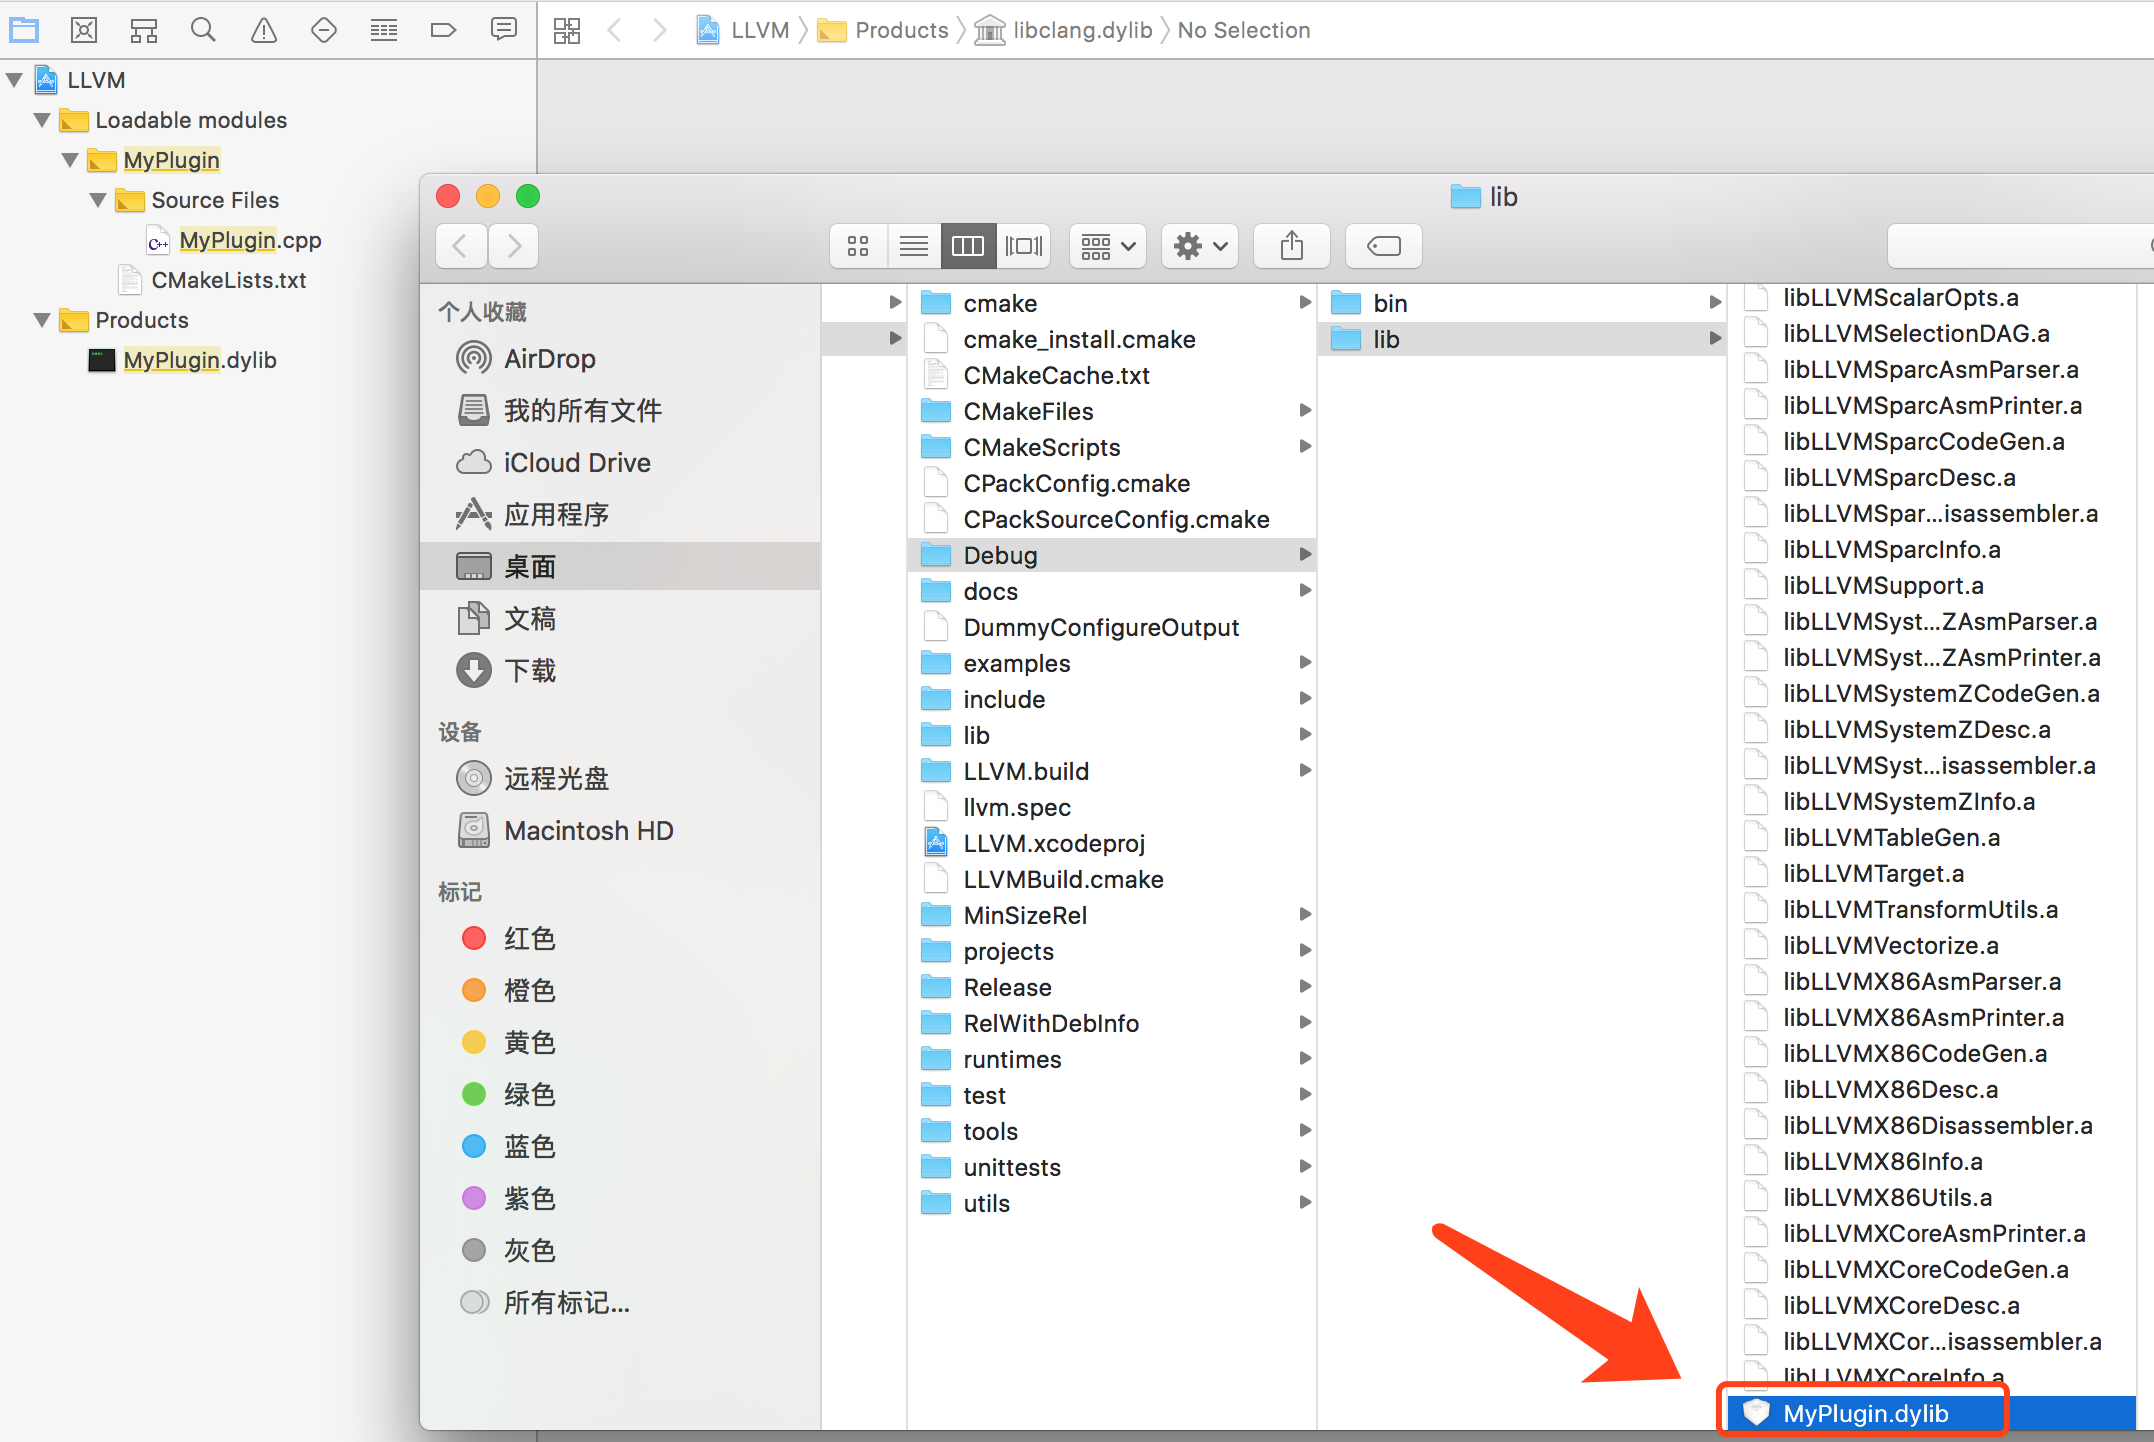
编译成功之后,就可以得到一个 MyPlugin.dylib ,我们将 MyPlugin.dylib 放在桌面上:
下载XcodeHacking.zip并解压
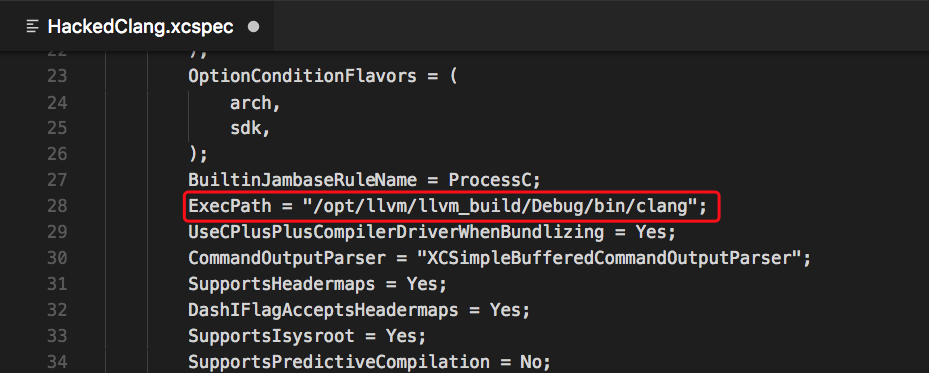
里面有 HackedBuildSystem.xcspec 和 HackedClang.xcplugin 两个文件,这里可能需要修改一下 HackedClang.xcplugin/Contents/Resources/HackedClang.xcspec 文件,将 ExecPath 的值修改为你编译出来的 Clang 的目录:
到解压的 XcodeHacking 目录,将这两个文件用命令行移动到对应的目录下:
1
2
| sudo mv HackedClang.xcplugin `xcode-select -print-path`/../PlugIns/Xcode3Core.ideplugin/Contents/SharedSupport/Developer/Library/Xcode/Plug-ins
sudo mv HackedBuildSystem.xcspec `xcode-select -print-path`/Platforms/iPhoneSimulator.platform/Developer/Library/Xcode/Specifications
|
上面两个命令行其实就是把两个文件移动到 XCode 应用程序包里面
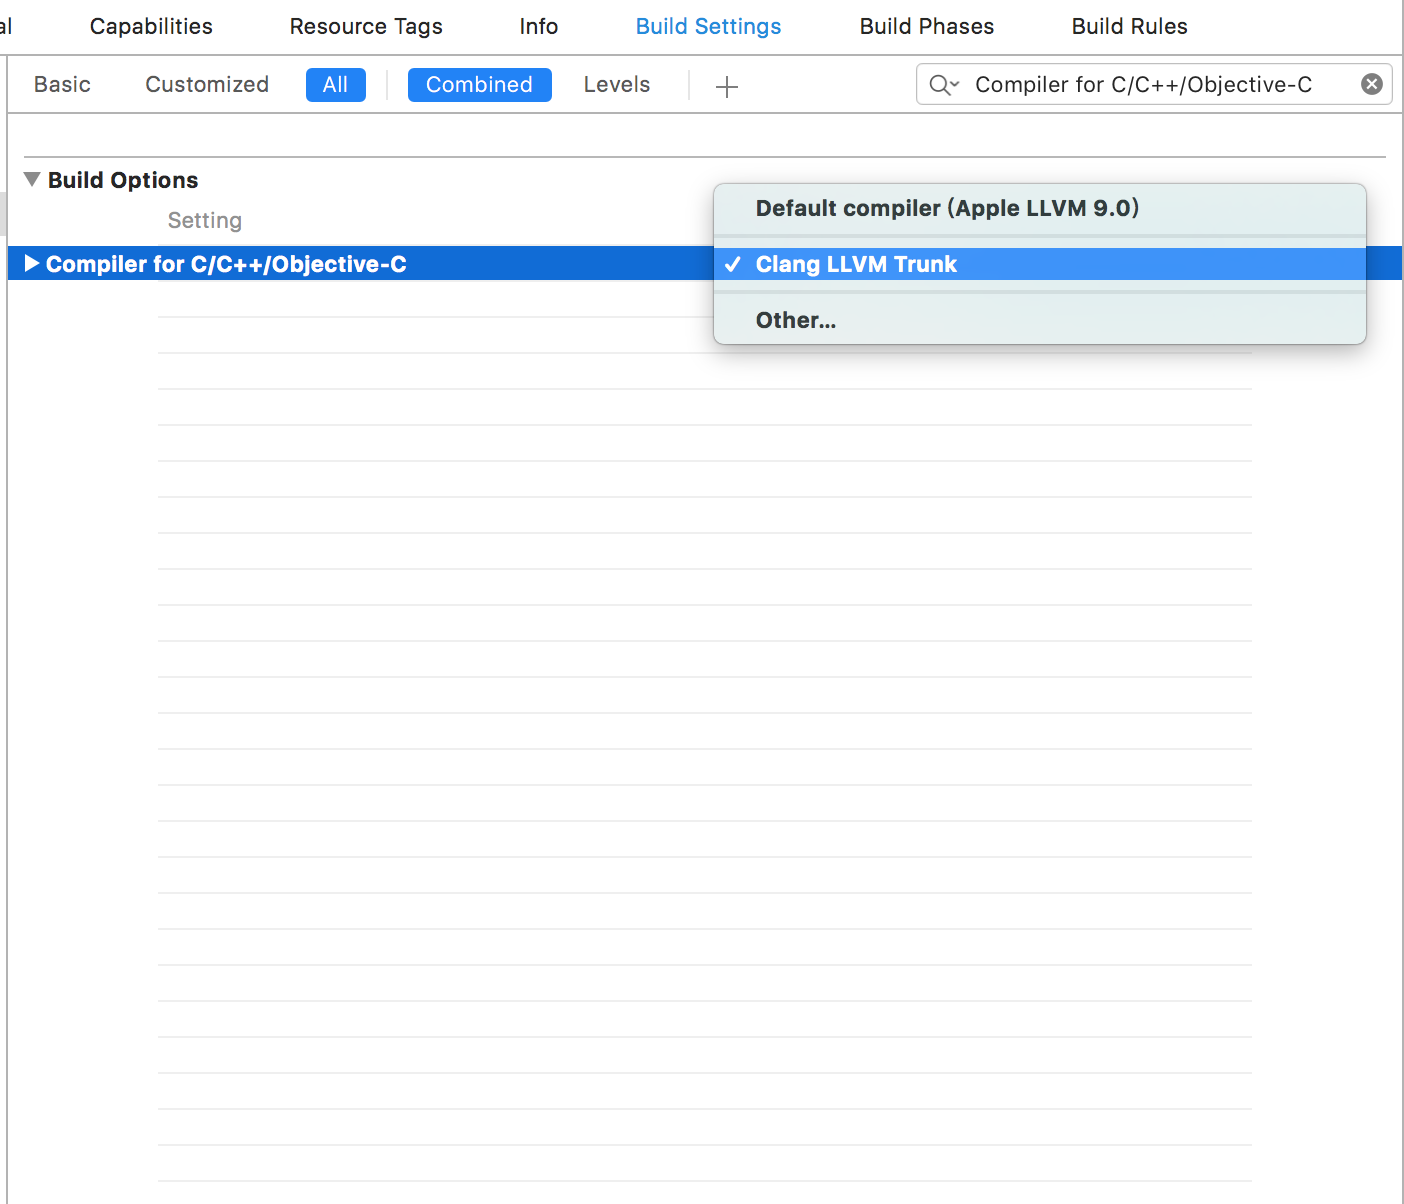
然后重启 Xcode,点击 Target 的 Build Settings,修改 Compiler for C/C++/Objective-C 项为 Clang LLVM Trunk(不进行第1步中 hack Xcode 操作的话是不会有这个选项的)
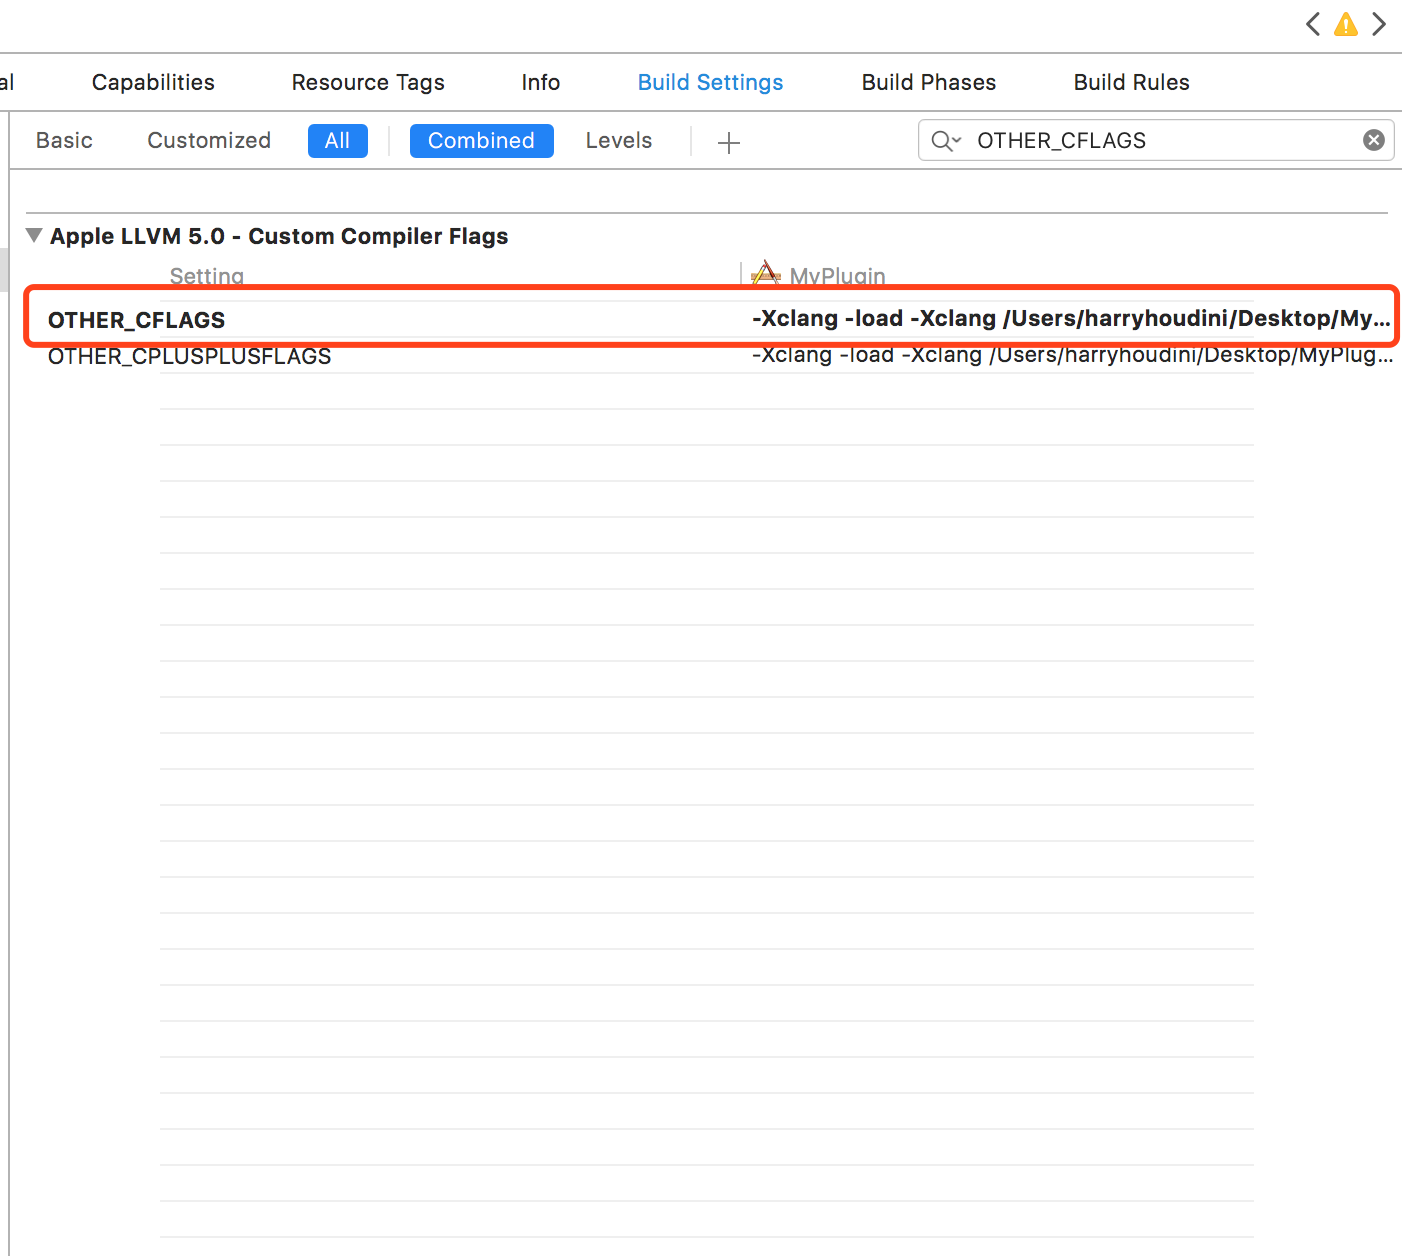
然后修改 OTHER_CFLAGS 选项:
1
| -Xclang -load -Xclang 你的 MyPlugin.dylib 路径 -Xclang -add-plugin -Xclang MyPlugin
|
注意:
如果编译中出现一大堆系统库的 symbol not found 错误的话,可以在上述命令的最后手动指定你的 SDK 目录,加上这句:
1
| -isysroot /Applications/Xcode.app/Contents/Developer/Platforms/iPhoneSimulator.platform/Developer/SDKs/iPhoneSimulator.sdk
|
最后编译你的项目,然后快捷键 Command+5 跳到编译报告,就能看到我们插件的输出了。


